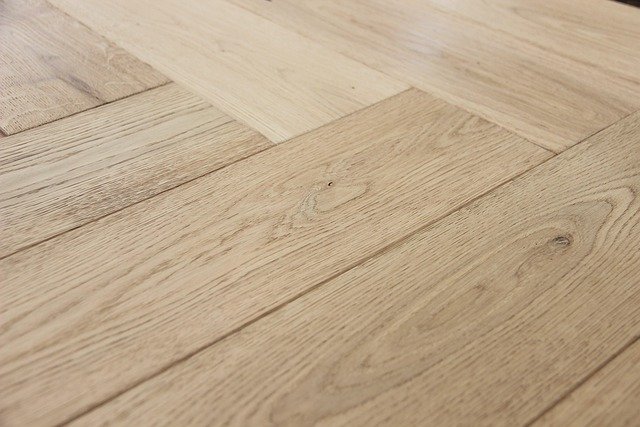
I spent most of last winter staring at the blank wall behind our TV, trying to talk myself out of a full board-and-batten project that felt like more commitment than the room deserved. What I actually wanted was something with more movement to it — a pattern, not just a grid of straight lines. Then I started noticing herringbone everywhere: not just on floors, but climbing up walls as thin painted strips arranged in that same zigzag you’d see on a tailored blazer or an old European parquet floor. It turns out that instinct was right on time. Herringbone is having a real, documented moment heading into 2026, on floors and walls both, and after building one myself over a single weekend, I can say it’s a far more approachable project than it looks in photos. A quick note before we get into it: a few of the tools and materials below link out to Amazon, and as an Amazon Associate, I earn a small commission on qualifying purchases, at no extra cost to you — it’s part of how this site stays free to read.
Why Herringbone Is Everywhere Heading Into 2026
Herringbone isn’t a new pattern — it traces back to Roman road engineers, who laid interlocking bricks in the same zigzag for extra structural stability — but designers are pulling it out of strictly formal spaces and putting it on walls, not just floors, as a 2026 statement move. Hattie Hansard of Joanna Wood Interiors described exactly why the pattern reads so differently from a flat surface in comments to Homes & Gardens: “The herringbone floor acts almost like the foundation of the room’s character,” she said, adding that “the herringbone pattern introduces movement and rhythm, which helps break up what is quite a large open-plan volume.” Designer Gillian Segal made a related point about why the pattern has staying power instead of reading as a fad: “A great way to keep an accent floor feeling timeless is working with classic materials.” That logic applies just as well vertically. A herringbone wall gives a flat stretch of drywall the same depth and rhythm Hansard is describing, for a fraction of the cost and mess of a real herringbone floor.

What You’ll Need
This project builds the pattern out of thin, flat wood strips nailed directly to the wall at matching angles, then caulked, filled, and painted as one continuous surface — no framing, no drywall demo, and no need to hit every stud, since the strips themselves are light enough to hold with construction adhesive and a few nails. Plan for a full weekend: one day for cutting and installing, a second for filling, caulking, and painting.
- Thin underlayment or luan plywood sheets, ripped into strips (4-inch-wide strips work well for a standard living room wall; 6-inch strips cover a larger wall faster with less cutting). Thin plywood underlayment sheets like this rip down cleanly on a table saw.
- A miter saw to cut the 45-degree ends on every single strip — this is the one tool you genuinely can’t skip or substitute with a hand saw if you want clean, consistent angles. A compact miter saw like this one is enough for strips this thin.
- A table saw or circular saw with a rip guide, if your plywood sheets aren’t pre-cut into strips at the home center.
- A speed square to check that every angle matches before it goes on the wall. A basic speed square is inexpensive and you’ll use it constantly through this project.
- A brad nailer loaded with short brad nails, to tack each strip in place while construction adhesive sets. A cordless brad nailer is much faster than a hammer and finish nails for a project with this many individual pieces.
- Construction adhesive to bond each strip to the wall — the nails hold it while it cures, but the adhesive is what actually keeps it flat over time. A heavy-duty construction adhesive works well for lightweight plywood strips like these.
- Spacers to keep a consistent gap between every strip as you go — dimes work in a pinch, but a stack of small tile spacers is more consistent and easier to pull back out before the adhesive sets.
- Paintable caulk and a caulking gun, to seal every seam between the strips and the wall before painting. A paintable caulk and gun kit covers this step in one purchase.
- Lightweight spackle for nail holes, plus 220-grit sandpaper and a tack cloth. Lightweight spackle sands smoother than the heavy-bodied kind.
- Primer and your paint color of choice, applied with a small foam roller for the smoothest finish over the strips and gaps.
- A tape measure, pencil, and a long level or laser level to keep your centerline straight.
Step 1: Measure the Wall and Plan Your Strip Size
Measure the full width and height of your wall and decide on a strip width before you cut anything — 4-inch strips give you a tighter, more detailed pattern that suits a smaller wall or a space behind a bed or sofa; 6-inch strips cover a large wall with noticeably less cutting and installation time. Whichever width you choose, try to pick a size that divides evenly into a standard 4-by-8-foot sheet of plywood, so you’re not wasting a third of every sheet to scrap. Rip your sheets down into strips on the table saw before you touch the miter saw.
Step 2: Mark Your Centerline
Find the vertical center of your wall and mark it top to bottom with a level or laser line — every row of the herringbone pattern builds out from this line in both directions, so getting it plumb now saves you from a pattern that visibly drifts by the time you reach the far edge of the wall. This is the single most important line you’ll draw on the whole project; double-check it with a level before moving on.
Step 3: Cut and Install the First Row
Cut your first strip with a 45-degree angle on one end, and center it on your marked line with the point of the angle touching the line. Run a bead of construction adhesive on the back, press it into place, and tack it with two or three brad nails. Cut a second strip with the opposite 45-degree angle and butt it against the first, forming the first “V” of the pattern. Use your speed square constantly here — it’s much easier to catch a slightly off angle on strip number two than to notice the whole pattern has drifted by strip number twenty.
Step 4: Build the Pattern Row by Row
Once the first row is set, work outward in both directions, using your already-installed strips as the angle template for each new piece rather than re-measuring from scratch every time — trace the angle off the strip beside it, cut, and set a spacer before gluing and nailing the next one in. This is where the dime or tile spacers matter most: a consistent, small gap between every strip is what reads as an intentional woven pattern once it’s painted, instead of a jumble of boards jammed together. Work in sections rather than trying to fill the whole wall edge to edge in one pass, and step back every few rows to check that the pattern is staying straight and even from a normal viewing distance, not just up close on the ladder or stepstool.
Step 5: Fill In the Angled Edges
As you reach the top, bottom, and side edges of the wall, you’ll hit strips that need to be cut at an angle to fit flush against the ceiling, baseboard, or adjacent wall, rather than the full zigzag point. Hold each piece in place, mark exactly where it needs to be trimmed with a pencil, and cut it on the miter saw rather than guessing at the angle ahead of time — these edge pieces are specific to your exact wall dimensions and almost never match a standard angle cut.
Step 6: Fill, Caulk, and Sand
Once every strip is up and the adhesive has cured (check your product’s label, but plan on at least a few hours), fill every visible nail hole with spackle, let it dry, and sand it smooth and flush. Then run a bead of paintable caulk along every seam — between the strips and the wall, and along any hairline gaps where two cut ends meet — and smooth each line with a wet finger or a caulk tool before it skins over. This step is what turns a wall full of individual wood strips into something that reads as one continuous, finished surface once it’s painted, instead of a collection of separate boards.

Step 7: Prime and Paint
Prime the entire wall first, working a small angled brush into every seam and gap before rolling the flat sections. Let the primer dry fully, then apply at least two coats of your chosen paint color with a small foam roller, which lays down a smoother finish over the ridges and seams than a standard nap roller. If you’d rather show off the wood grain instead of painting it, a wood stain works the same way — just plan on staining each strip before installation rather than after, since stain pools differently in the seams than paint does.

Mistakes I’d Avoid Next Time
My centerline was slightly out of level on my first attempt — close enough that I didn’t catch it until about six rows in, when the pattern had visibly started to lean. I had to pull three strips back off and redo them, which cost me more time than just double-checking the line with an actual level instead of eyeballing it off a stud would have in the first place. I’d also recommend dry-fitting your first several rows without any adhesive, just to confirm your angle and spacing look right from across the room before anything is permanently glued down — it’s a lot easier to adjust loose pieces than ones already bonded to the wall.
The whole project took me a Saturday for cutting and installation and a Sunday for filling, caulking, and painting — more involved than a weekend paint job, but nowhere near the commitment of a full board-and-batten build or a real herringbone hardwood floor. What I ended up with is a wall with genuine depth and movement to it, the exact thing a flat stretch of drywall can’t give a room no matter what color you paint it. If you’ve got one blank wall doing nothing in your house the way mine was, this is a legitimately approachable way to give it some actual character.