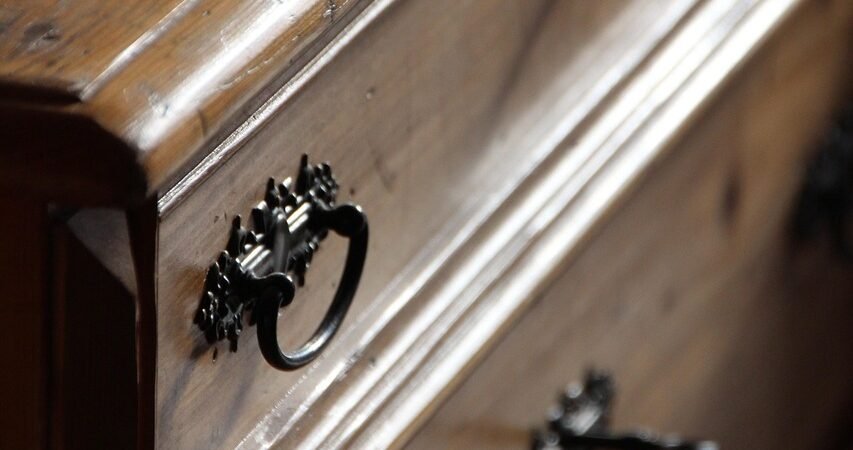
The dresser had been in my parents’ guest room since roughly 1994, and when it landed in my apartment last spring, it looked every bit its age — oak-veneer top gone cloudy with water rings, brass pulls the color of an old penny, and a finish so dull it barely reflected light. My first instinct was to haul it to the curb. My budget said otherwise: a comparable six-drawer dresser at a furniture store started around $600, and this one was free, solid, and dovetailed at every joint in a way new furniture rarely is anymore. So instead of replacing it, I spent one weekend and about $65 turning it into the piece that now anchors my bedroom — a deep, matte green case with brushed-brass pulls that gets asked about more than anything else in the room. If you’ve got a tired dresser sitting in a garage, a bedroom, or a curb-alert listing, this guide walks through the entire process: prepping the wood, choosing between paint and stain, applying a durable finish, swapping hardware, and sealing everything so it holds up to years of actual use.
Why Refinish Instead of Replace
Older dressers, especially anything made before the early 2000s, are frequently built from solid wood or real veneer over plywood, with drawers that use dovetail or dowel joinery instead of glue and staples. That construction is worth preserving. A fresh finish and updated hardware can make a dated piece look like it came from a boutique furniture line, at a fraction of the cost of buying new, and it keeps a perfectly functional piece of furniture out of a landfill. The project below works whether your dresser is bare wood, painted, laminate, or varnished — the prep step just shifts slightly depending on what you’re starting with.
Materials and Tools You’ll Need
- Screwdriver (for removing existing hardware and drawers)
- 120-grit and 220-grit sandpaper, or a random orbital sander
- Tack cloth or a lint-free rag plus mineral spirits
- Wood filler (if there are dents, gouges, or old hardware holes to patch)
- Painter’s tape and a plastic drop cloth
- Stain-blocking primer (if painting) or wood conditioner (if staining)
- Cabinet-and-furniture paint or interior/exterior enamel, OR gel stain / oil-based wood stain
- Angled sash brush and a foam or microfiber mini roller
- Clear polyurethane, polycrylic, or a hard-wax oil topcoat
- New knobs or pulls, plus a tape measure and pencil
- Drill with a bit sized to your new hardware’s screws (only needed if hole spacing changes)
- Optional: painter’s tape for a two-tone design, or a stencil and pouncer brush for a pattern
Step 1: Disassemble and Assess
Pull every drawer out and set them on a drop cloth or workbench, then remove all hardware — knobs, pulls, and any decorative escutcheons — and bag the screws separately so you don’t lose them if you’re reusing any. Working with the drawers and the case separately makes every later step faster and gives you cleaner coverage, since you’re not fighting drawer fronts that sit flush against the frame. While everything is apart, check the piece over: wiggle each drawer to feel for loose joints, look for water damage or delamination on veneer, and note any old hardware holes that won’t line up with your new pulls. This is also the moment to glue and clamp any loose joints, since paint or stain won’t hide a wobble — it’ll just draw attention to it.
Step 2: Clean and Sand
Wipe every surface down with a rag dampened in mineral spirits to cut through decades of furniture polish, dust, and grease — skipping this step is the single biggest reason paint fails to bond later. Once the piece is dry, sand the whole thing with 120-grit paper to scuff the existing finish and give primer or stain something to grip; you’re not trying to strip the wood bare, just dull the sheen so it’s no longer slick. A random orbital sander speeds up flat surfaces like the top and drawer fronts, but hand-sand any carved detail, edges, or moldings so you don’t round off the profile. Finish with a pass of 220-grit for a smoother surface, then vacuum thoroughly and wipe everything down with a tack cloth to pull off every trace of dust — leftover grit is what causes that gritty, sandpaper-like texture under a finished coat of paint.
Step 3: Fill, Patch, and Repair
If your new hardware won’t line up with the existing holes, or if there are dents, dings, or chips in the veneer, now’s the time to fix them. Press wood filler into holes and gouges with a putty knife, slightly overfilling since it shrinks a bit as it dries, then let it cure fully per the product’s instructions before sanding it flush with 220-grit paper. For veneer that’s lifting or bubbling at an edge, a small amount of wood glue worked underneath with a palette knife and clamped overnight will reseat it far more reliably than filler alone. Wipe away sanding dust one more time before moving to primer or stain — every prep step compounds, so a shortcut here shows up in the final finish.
Step 4: Choose Paint or Stain
This is the decision that shapes the whole project, and it comes down to what condition the wood is in and what look you want. Paint is more forgiving: it covers repairs, mismatched wood tones, and old stains completely, and it opens the door to bold, saturated colors that solid wood tone simply can’t deliver on its own. Stain, on the other hand, only works well on solid wood or real wood veneer in decent shape, since it lets the existing grain show through rather than hiding it — but when the wood underneath is attractive, a rich stain color can look more elevated and less “furniture store” than paint. Deep, moody colors are having a real moment in furniture right now: forest green, ink navy, warm terracotta, and matte black are all showing up on refinished pieces far more than the soft pastels that were popular a few years back, so don’t be afraid to go saturated if the piece is a bedroom or entryway accent rather than a piece that needs to blend into a larger room.
If You’re Painting
Apply a stain-blocking primer first, especially over darker existing finishes or any wood filler patches, so old stains and repairs don’t bleed through your topcoat. Let it dry fully, then lightly sand with 220-grit to knock down any raised grain before your color coat. Use a cabinet-and-furniture-specific paint if you can find one, since these are formulated to level out smoothly and resist chipping better than standard wall paint; apply two thin coats with a foam roller for the flat panels and an angled brush for edges and detail work, sanding lightly between coats with a fine grit for a glass-smooth result.
If You’re Staining
Start with a coat of pre-stain wood conditioner if you’re working with a softer or more porous wood like pine, which helps the stain absorb evenly instead of blotching. Apply gel stain or oil-based stain with a rag or brush, working in the direction of the grain, then wipe off the excess after the time listed on the can — the longer you leave it before wiping, the darker and more saturated the final color. Let it dry fully (usually 24 hours) before adding a second coat if you want a deeper tone, and always test your stain color on a hidden spot, like the inside of a drawer, before committing to the whole piece.
Step 5: Try a Two-Tone Finish or Stencil (Optional)
A two-tone dresser — a painted case with a stained or contrasting-painted top, or drawer fronts in one color against a body in another — reads as far more custom than a single flat color, and it’s simple to pull off with painter’s tape. Paint or stain the base color first and let it cure fully, then mask off a crisp line with tape, burnishing the edge down with the back of a spoon or a plastic scraper so paint can’t bleed underneath, and apply your second color. Pull the tape while the paint is still slightly tacky rather than fully dry, which gives a cleaner edge than waiting until it’s hard. For a stenciled pattern instead, secure a stencil to a dry, painted drawer front with painter’s tape or repositionable spray adhesive, then use a pouncer brush or small foam roller loaded with very little paint, dabbing straight down rather than dragging the brush, which is what causes paint to seep under the stencil edges and blur the design.
Step 6: Update the Hardware
New knobs or pulls do more to modernize a dresser than almost any other single change, and they’re the fastest way to shift the whole look — brushed brass and matte black are currently the two most popular finishes for exactly this kind of update, both reading as considerably more current than the polished chrome or oxidized brass common on older furniture. If your new hardware uses the same screw spacing as the old pieces, installation is as simple as screwing it back in through the existing holes. If the spacing is different, measure and mark new hole locations with painter’s tape and a pencil before drilling, double-checking that pulls will sit centered and level across each drawer front, and fill the old holes with wood filler, sand smooth, and touch up the paint or stain before installing anything new. Standardize on one pull size and style across the whole piece unless you’re deliberately mixing metals as a design choice — a random assortment of leftover hardware is one of the fastest ways to make an otherwise good refinish look unfinished.
Step 7: Seal and Protect the Finish
A dresser gets more daily wear than almost any other piece of furniture — hands on the drawer fronts, items set on top, the occasional bump from a vacuum or a kid’s toy — so skipping a topcoat means your paint or stain job won’t last. Apply two thin coats of a clear polyurethane or polycrylic with a high-quality synthetic brush, working in long, even strokes and watching for drips along edges and corners where finish tends to pool. Polycrylic is water-based, dries fast, and stays clear over light colors like white or pale green, while oil-based polyurethane is more durable but can add a slight amber tint, which matters most if you’ve painted a piece a cool tone like white or gray. Sand very lightly with a fine 320-grit paper between coats to knock down any dust nibs, and let the final coat cure for a full 24 to 48 hours before setting anything heavy on top, even though it may feel dry to the touch much sooner.
Step 8: Reassemble
Once the topcoat has fully cured, reattach all hardware, making sure screws are snug but not overtightened, which can strip the wood or crack a filled hole. Slide the drawers back into the case one at a time, checking that each one runs smoothly on its tracks or glides — if a drawer sticks, a light pass of paste wax or a candle stub rubbed along the wood runners will help it slide freely without adding another coat of finish inside the case. Give the whole piece a final look under good light for any missed spots, drips, or rough patches before moving it into place.
Common Mistakes to Avoid
Skipping or Rushing the Sanding Step
Paint and stain both rely on mechanical grip to bond to a surface, not just chemistry. A glossy, unsanded surface will look fine for a few weeks and then start peeling or chipping at the edges within months, especially on high-touch areas like drawer fronts.
Applying Thick Coats to Save Time
A single heavy coat of paint or stain looks tempting as a shortcut, but it dries unevenly, shows brush marks, and takes far longer to cure than two or three thin coats. Thin, even layers with light sanding between them are what produce a smooth, professional-looking result.
Ignoring the Direction of the Wood Grain
Brushing or wiping stain against the grain, rather than with it, causes streaking and uneven color absorption that’s difficult to fix once it’s dry. Always work stain, and even paint on a wood-grained surface, in the same direction as the grain runs.
Forgetting to Test Color First
Stain in particular can look dramatically different on a paint chip than it does on your actual wood, since porosity and existing tone both affect the final color. Always test on an inconspicuous spot, like a drawer interior or the back panel, before committing.
Mismatched or Randomly Placed Hardware
Pulls installed slightly off-center, or a mix of finishes that wasn’t a deliberate design choice, are the fastest way to undercut an otherwise great refinish. Measure twice, use painter’s tape to mark placement, and confirm everything lines up before drilling.
Skipping the Protective Topcoat
A dresser without a sealed finish will show scuffs, water rings, and wear within weeks, no matter how good the paint job looked on day one. The topcoat is what makes this a piece of furniture that lasts, not just a weekend project that looks good in photos.
Final Thoughts
That old dresser is still, structurally, the exact same piece it was when it sat in my parents’ guest room decades ago — same dovetailed drawers, same solid wood frame — but a weekend of sanding, a saturated coat of paint, and a set of brushed-brass pulls changed how it functions in my life completely. It went from something I was embarrassed to have in a shared living space to the first thing people mention when they walk into the room. If you’ve got a dresser you’ve been meaning to replace, take an afternoon to really look at the joinery and the wood underneath the dated finish first — there’s a good chance what you actually need is a can of paint and a new set of pulls, not a trip to the furniture store.